
301 Redirects when Deactivating web pages
So the funniest thing happened to me this morning.
On my way to a meeting, it dawned on me that I should have a video handy. In order to view that video, I needed a password, so, I got that and opened a browser to test it.
I could not remember the exact name of the page, so, I did a search on Google.
Well, well, well…I found the page I wanted, PLUS a page that I had no idea was listed in Google.
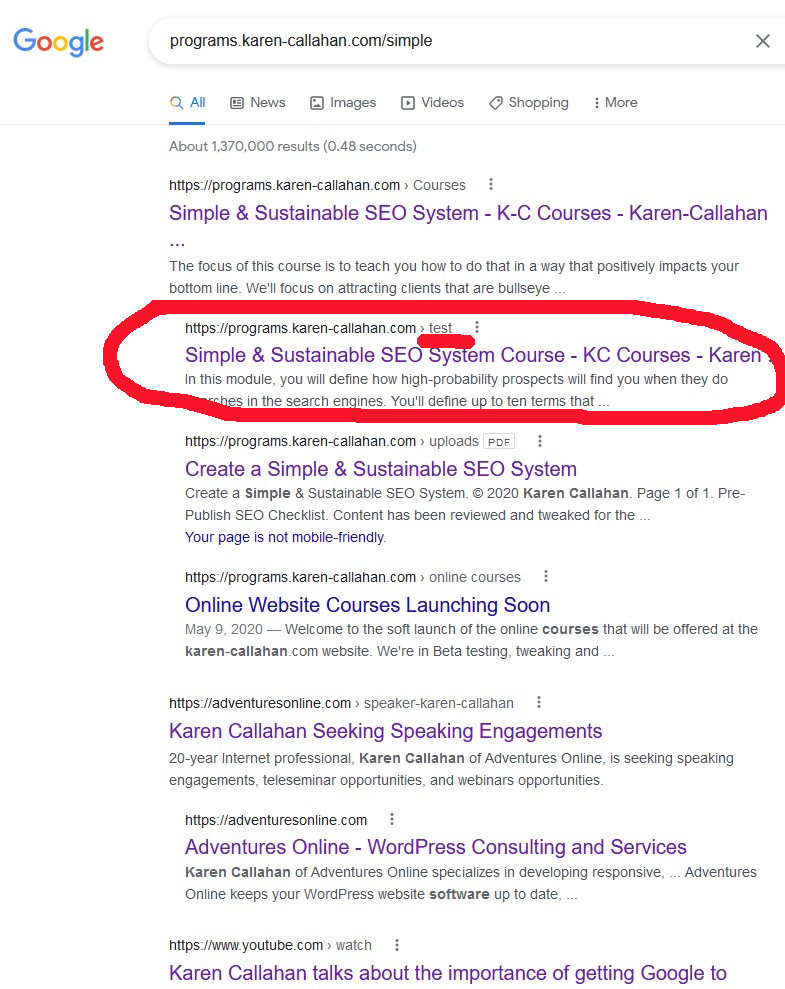
The page name was “test”.
Evidently, in May, 2020, I was testing how the syllabus of my online SEO course would look on a page.
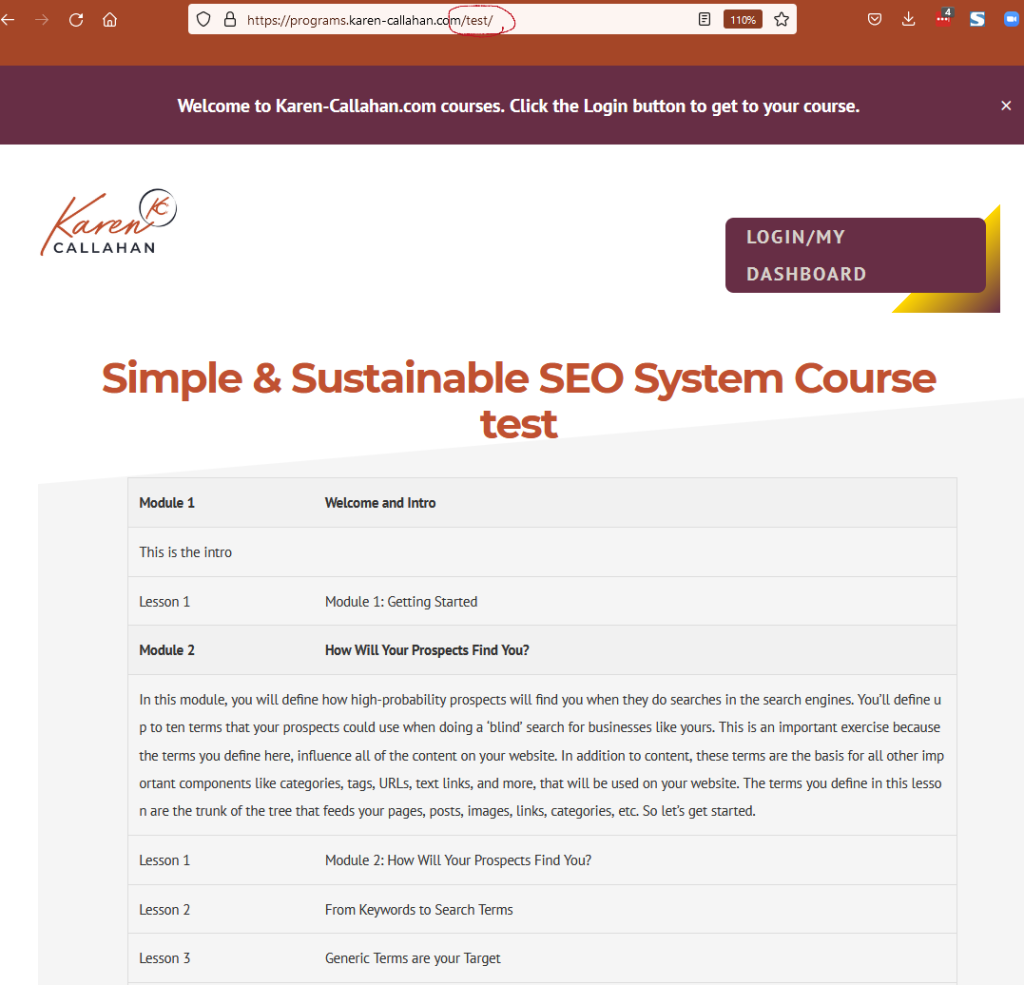
I guess I didn’t like it since the page had not been renamed nor linked to nor added to a menu, and, instead, had been totally forgotten.
Naturally, this morning, I wanted to deactivate the page right away, but, I couldn’t because 1) I was heading into a meeting and didn’t have the time, and, 2) I know the proper way to deactivate pages so that I preserve SEO, and that takes a couple more steps than just logging in and deactivating a page. The “test” page had been listed in Google for over 2 years.
I needed a 301 Redirect!
And, this website had no plugin for adding 301 redirects, so I installed one.
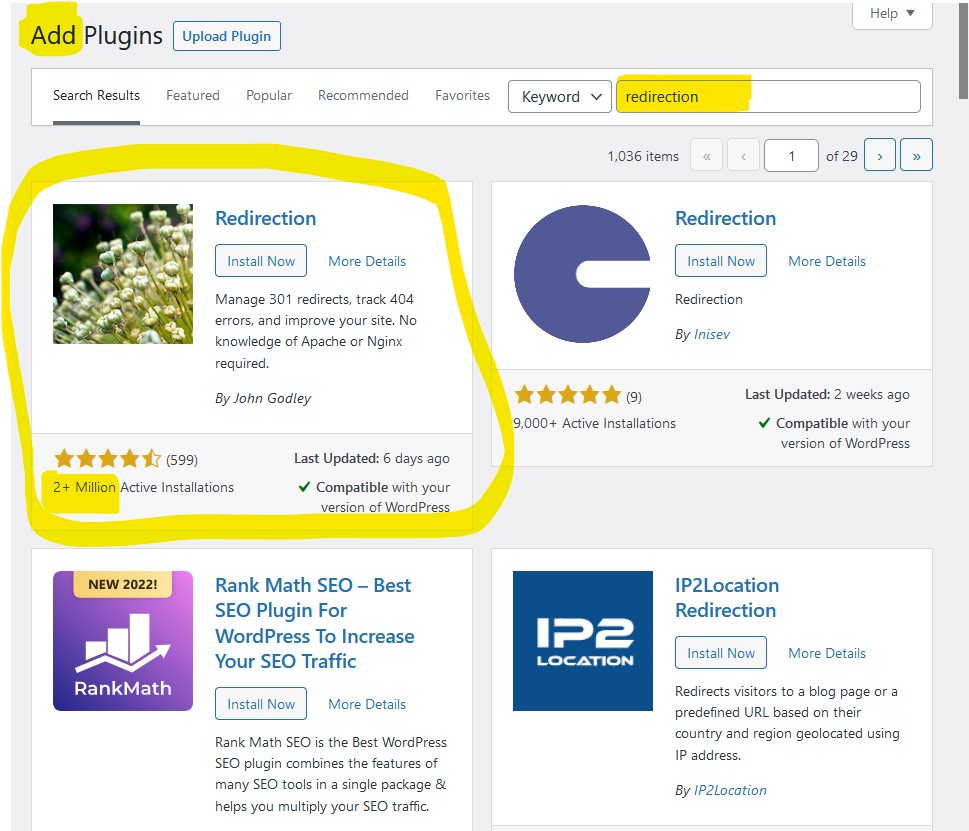
Once the suggested plugins displayed, I selected Redirection by John Godley.
This is my favorite 301 redirect plugin. It is very popular and has over 2 million installs.
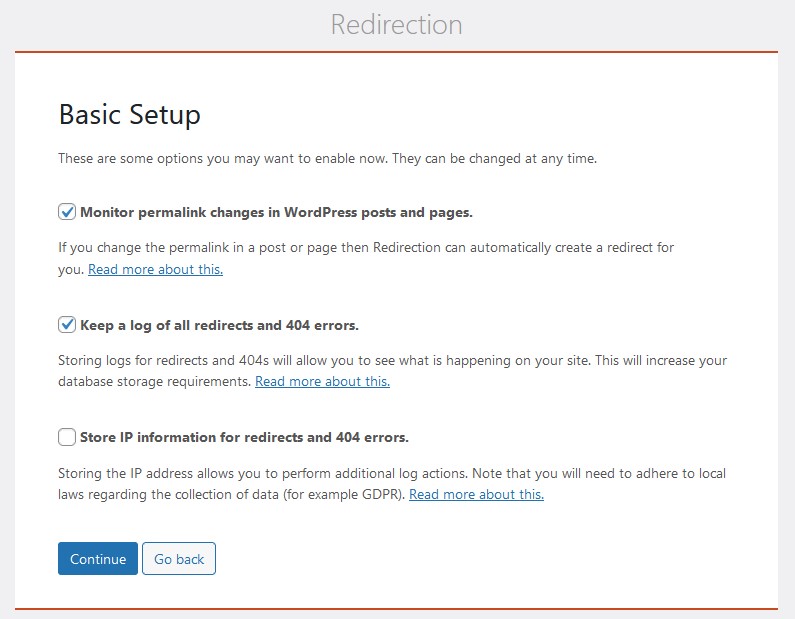
When the Redirection plugin loads for the first time, it provides simple 301 redirect instructions on its Welcome Page. Basically, you need two things for a 301 redirect; a source URL and a Target (destination) URL.

Read those, and click Start Setup. Setup is easy. Here’s the choices I made for this website.
How to add a 301 Redirect to your WordPress website
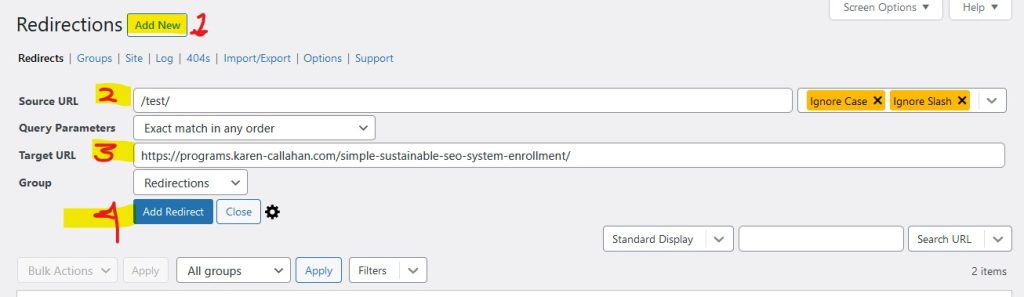
Once the setup was complete, I clicked on Redirect, then Add New.
Before filling in the blanks, I copied my Source and Target URLs into Notepad so that I had them handy.
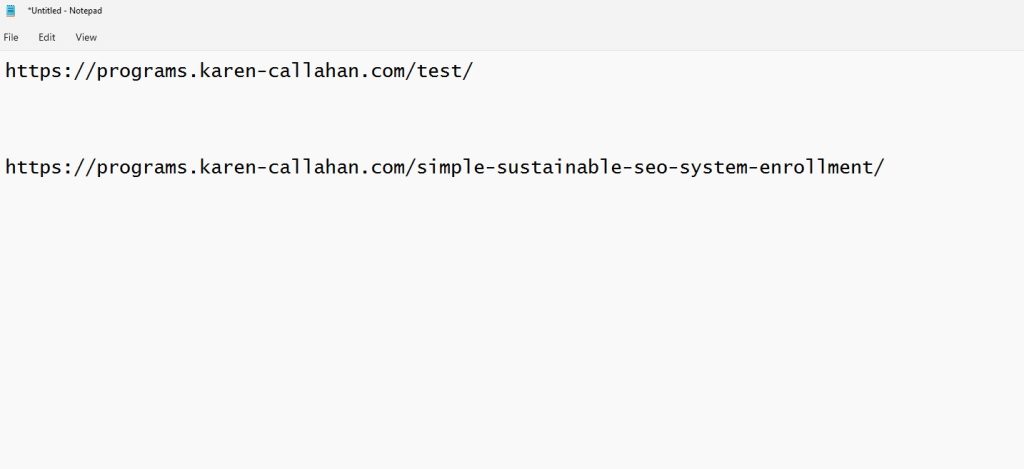
I returned to the website Dashboard and added a 301 redirect. I copied the slug from the Source address and pasted that into the Source URL. Then copied the entire destination URL and pasted that into the Target URL space and saved.
After saving the 301 Redirect, I edited the “test” page and changed the page status to Draft.
Then I went into Google and repeated the original search. The page was still listed as “test”. When I clicked on the link, the destination URL (I put in the 301 Redirect) displayed.
So that is the process I used to remove the page from Google while maintaining my SEO value.
One issue I encountered on this website is that it is my programs website and does not have content nor blog pages; just sign-up and enrollment pages. Choosing a destination page (target URL) for my 301 redirect was a little more challenging. In the end, I chose to redirect the “test” page to the enrollment page for my words-based SEO course for non-techs which is my longest running and most popular course.
Try using this process and let me know your success, questions, and comments.
Coincidentally, I hosted a webinar last week on this exact subject of adding 301 redirects. It was called, Preserving SEO when Deleting Pages. Deactivating pages is effectively deleting pages. I can’t help but notice the serendipity of how this happened today. Just sayin’.